Upload audio
This guide explains how to manually upload audio in AuditorIA. From this screen, you can use the standard upload for one or more independent audio files, or Fragmented call when one call was recorded across several files.
When you start the upload, AuditorIA creates a processing task so the call can be transcribed and reviewed.
If your team loads audio through an integration, you may not need this screen. In that case, search for the audio from Search audio or find the created task from Search tasks and audio.
Open Upload file
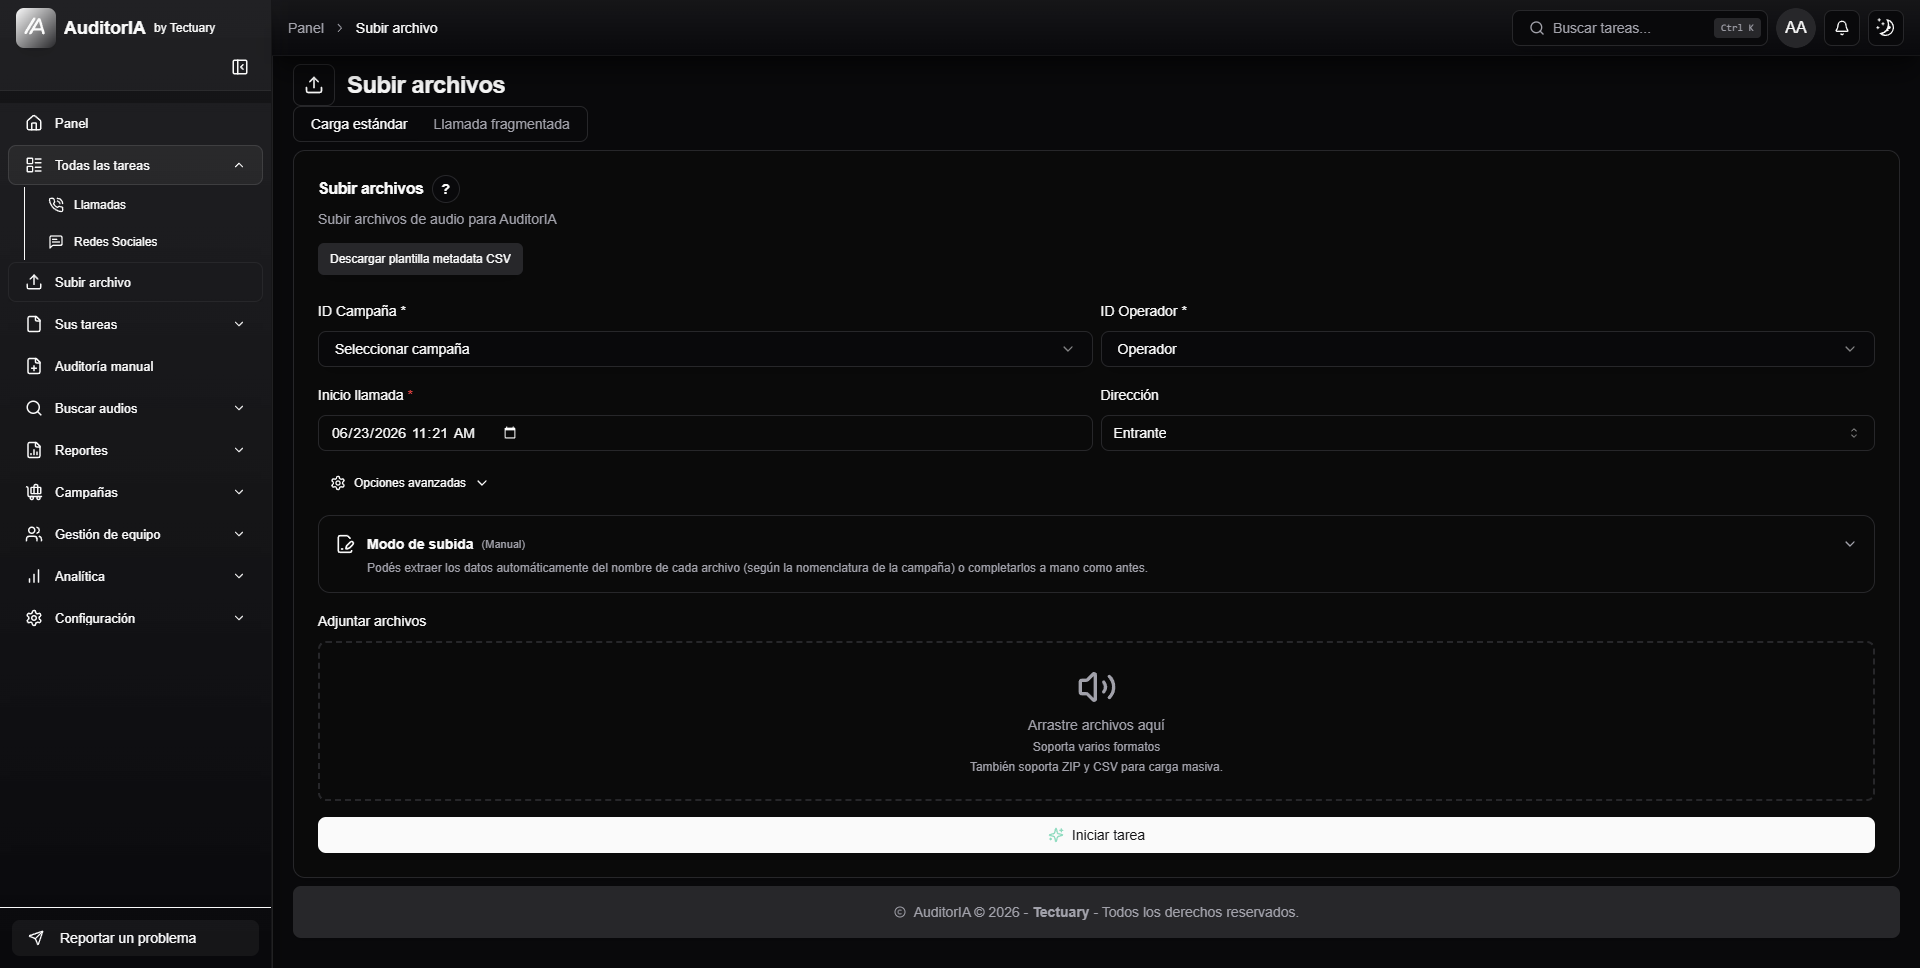
In the sidebar, click Upload file. The screen opens with the title Upload files.
The section may not appear if your user does not have permission to upload files manually.
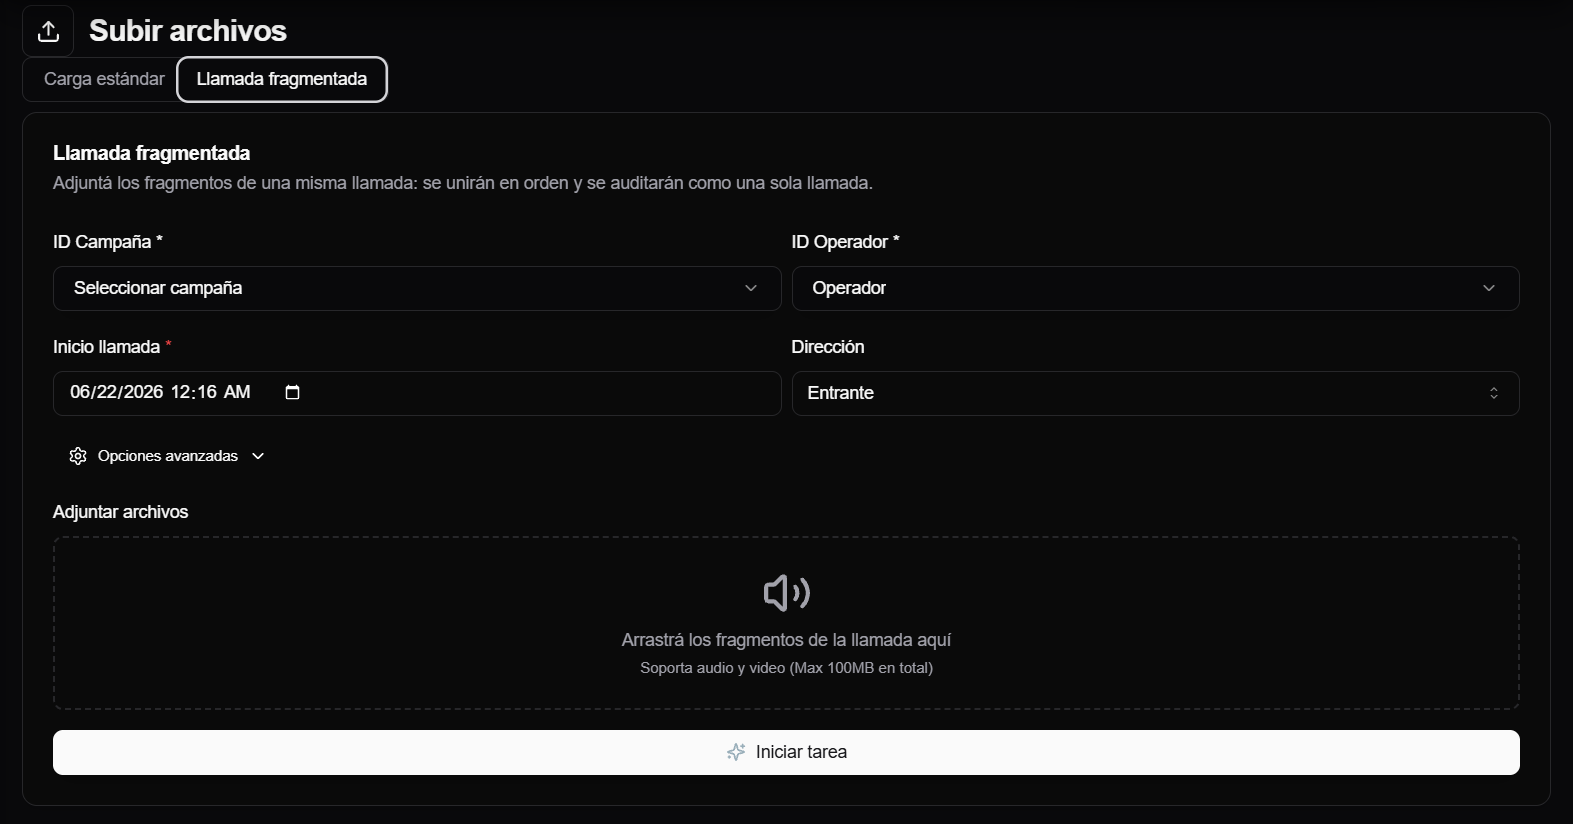
Choose the upload type
The screen has two tabs:
- Standard upload, for one audio file, several independent audio files, or a bulk upload with ZIP + CSV.
- Fragmented call, for several files that are parts of the same call and should be processed as one conversation.
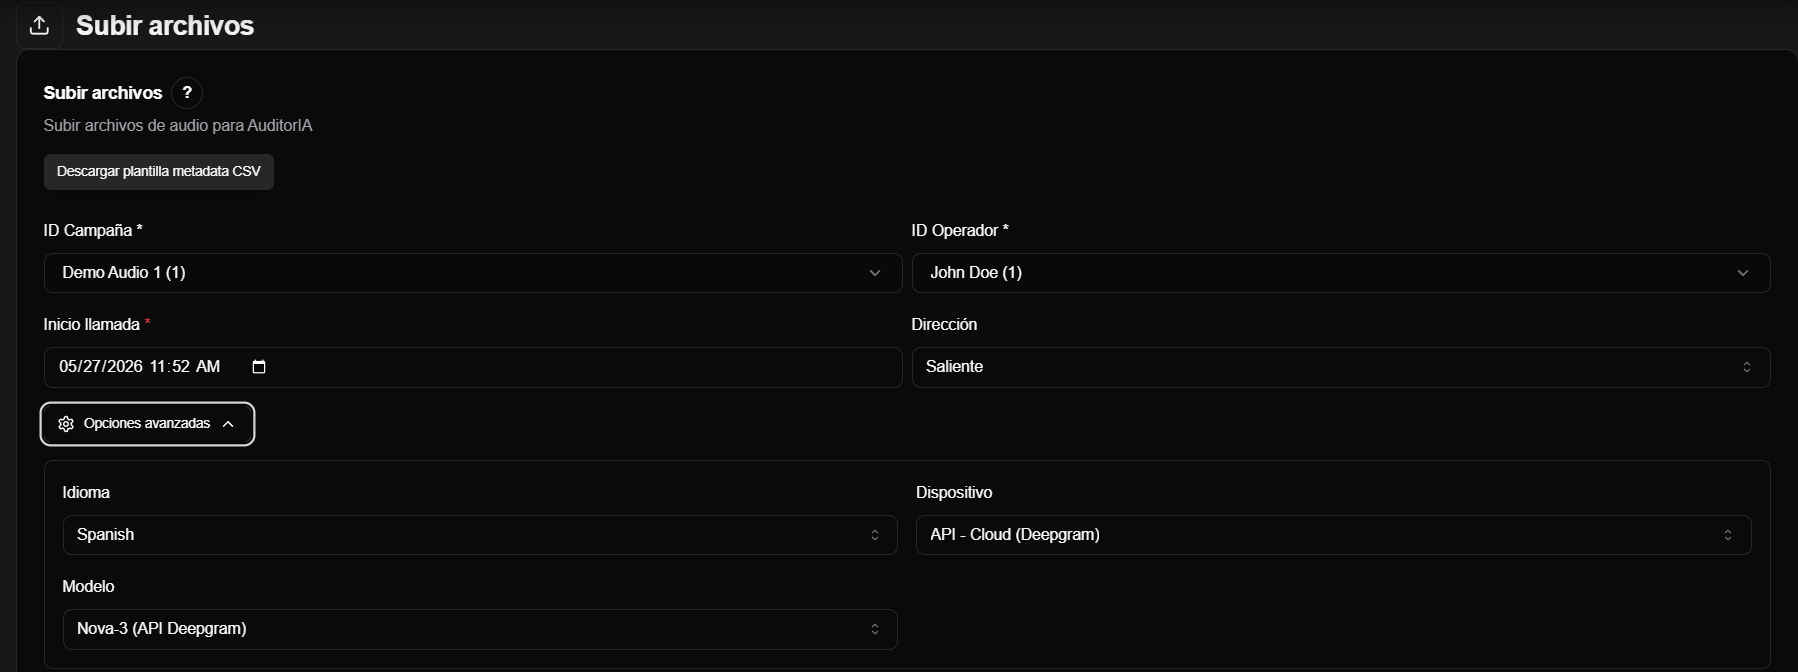
Complete the details
Before attaching the audio, complete the main call details.
| Field | What to enter |
|---|---|
| Campaign ID | Campaign the audio belongs to. It defines the audit context. |
| Operator ID | Person being evaluated in the call. It becomes available after choosing the campaign. |
| Call start | Date and time when the call started. |
| Direction | Whether the call was Inbound or Outbound. |
If you do not see the campaign or operator you need, it may depend on your permissions or the campaign configuration.
If those records do not exist yet, they need to be created or assigned from the corresponding sections first: Campaigns, Local operators, and Quality scorecards.
Attach files in standard upload
In the Standard upload tab, under Attach files, click the upload area or drag files onto the screen.
You can upload:
- one audio file;
- several supported audio or video files, when each file is a different call;
- a bulk upload with ZIP + CSV.
After you attach files, AuditorIA shows per-file configuration. Check that each audio has the correct campaign, operator, date/time, and direction. If all files share the same values, you can use Apply global values to all.
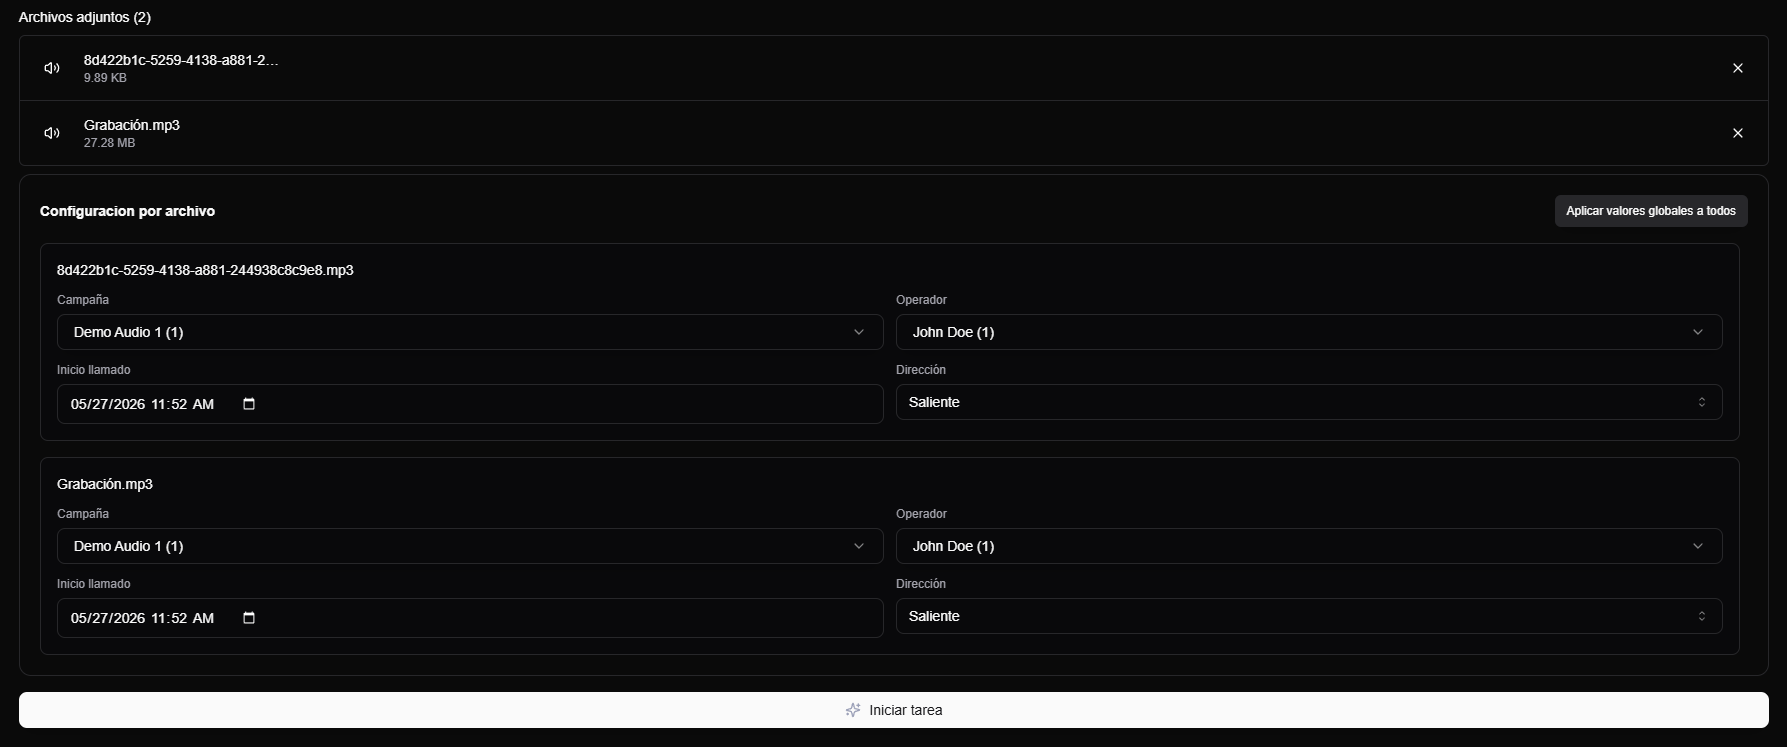
The current limits are 100 MB per file and 100 MB per batch. If a file exceeds that size, the upload may fail.
Bulk upload with ZIP + CSV
To upload several audio files together, prepare two files:
- a ZIP with the audio files;
- a metadata CSV with the information for each audio file.
The CSV does not contain the audio. It tells AuditorIA which campaign, operator, date/time, and direction correspond to each file included in the ZIP.
To use it:
- Click Download metadata CSV template.
- Complete one row for each audio file you will include in the ZIP.
- Keep the column names from the template.
- Create the ZIP with the audio files.
- Attach both the ZIP and the CSV in the upload.
The template includes these columns:
| Column | What to enter |
|---|---|
file_name | Exact name of the audio file. |
operator_id | ID of the operator or evaluated person. |
campaign_id | Campaign ID. |
inicio_llamado | Date and time when the call started. |
direction | Call direction, for example ENTRANTE or SALIENTE. |
The value in file_name must match the audio file name inside the ZIP. If it does not match, AuditorIA cannot apply that row to the correct file.
Upload a fragmented call
Use Fragmented call when one call was split into several files. AuditorIA merges those fragments and creates a single task for the complete call.
Do not use this mode to upload several different calls. If each file is a separate call, use Standard upload.
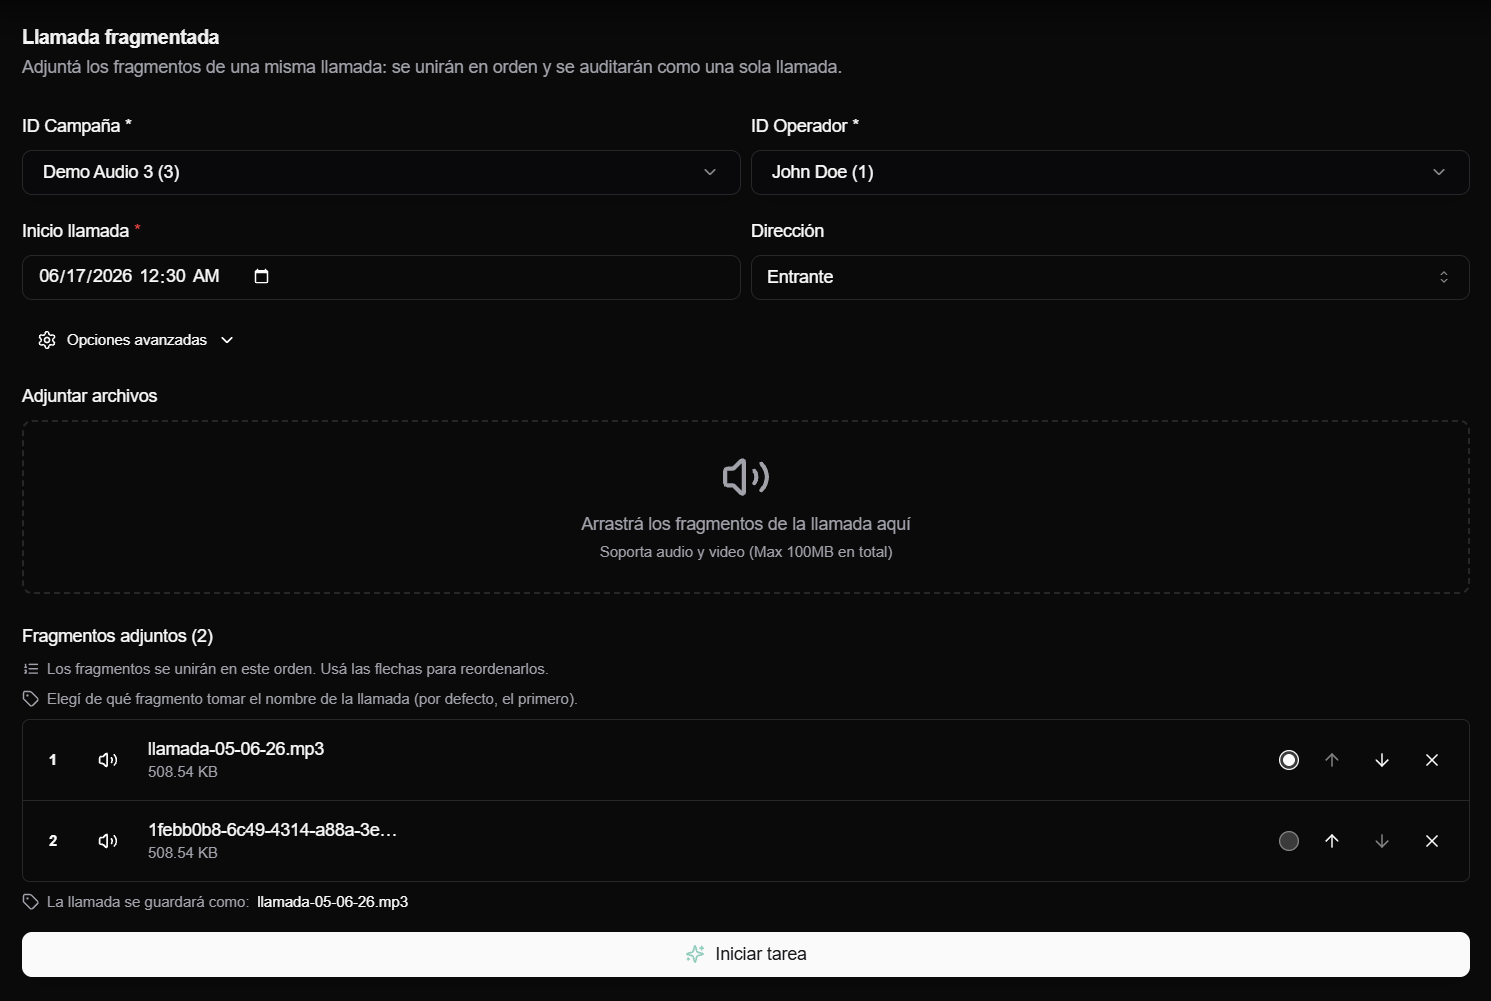
Complete the shared details
In a fragmented call, Campaign ID, Operator ID, Call start, and Direction apply to the final call, not to each fragment separately.
This means all fragments must belong to the same call, the same campaign, and the same operator.
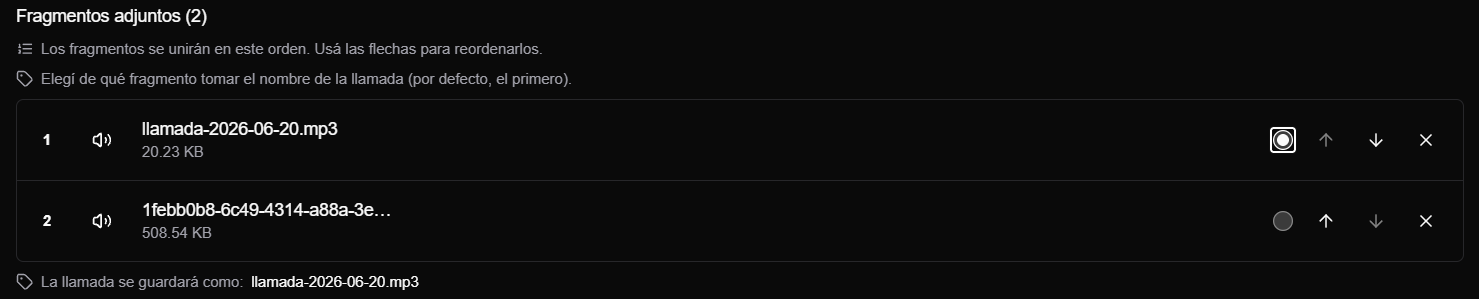
Attach and order fragments
Attach at least two audio or video files. The fragmented call tab does not accept ZIP or CSV.
After the fragments are attached, AuditorIA shows them numbered. That is the order in which they will be merged. Use the arrows to move fragments up or down until the sequence is correct.
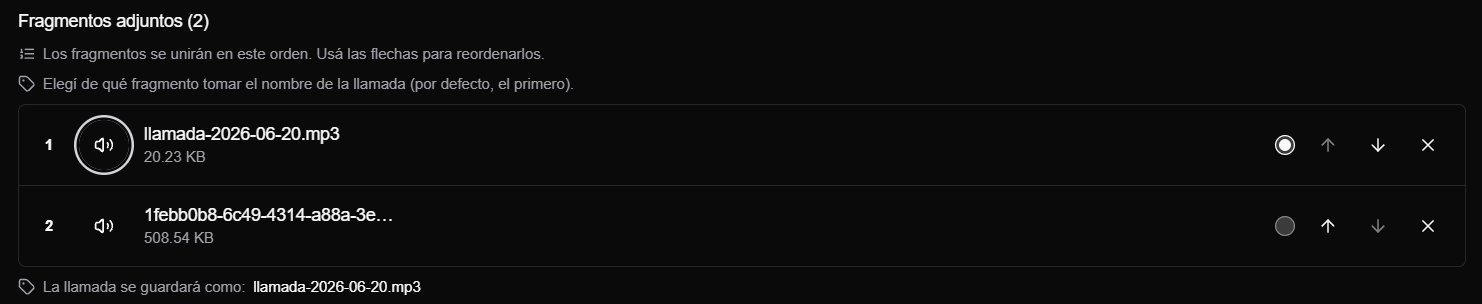
You can use the play button to review a fragment before starting the task, and the delete button if you attached the wrong one.
Choose the final call name
The final call takes its name from one of the fragments. By default, AuditorIA uses the first fragment, but you can select another one with the circular selector.
The merged file is saved as .mp3, even if the selected fragment has another extension. For example, if you choose part-2.wav, the final call is saved as part-2.mp3.
Choose a fragment with a clear and unique name. If a call with the same final name already exists, AuditorIA rejects the upload and you will need to choose another fragment as the name source or correct the file.
Start the fragmented call task
When the order and final name are correct, click Start task.
AuditorIA queues one task. If any fragment is invalid or cannot be merged, the upload is not left halfway done: correct the files and try again.
Advanced options
The screen includes Advanced options for language, device, and model.
For normal use, leave them as they are unless your team tells you to change something. These options are for specific cases where audio processing needs adjustment.
Advanced options apply to both standard upload and fragmented calls.
Start the task
When the details are complete:
- Review campaign, operator, date, direction, and attached files.
- Click Start task.
- Wait for the upload confirmation.
If you uploaded one file, you will see a confirmation such as Task sent. If you uploaded several files, the screen may show how many tasks were queued.
What happens next
After you start the task, AuditorIA processes the audio to generate the transcription and the information needed for review.
While processing is not finished, the task may appear as pending or in progress. When it finishes, you can open the task and review the transcription.
If the audio was already loaded
Some audio files may enter AuditorIA through integrations or previous uploads. In those cases, you do not need to upload them again from this screen.
Use Search audio to find audio records by campaign, operator, date, or direction. In that table, you may see actions such as:
- Transcribe audio, when the audio is loaded but does not have a processed task yet;
- View task, when the audio already has an associated task and can be opened.
Those actions belong to the audio search flow. This page only mentions them so you know how to continue if the audio already existed.
Continue
- To find an existing task or loaded audio, continue with Search tasks and audio.
- To review and validate the audit, continue with Review a call audit.